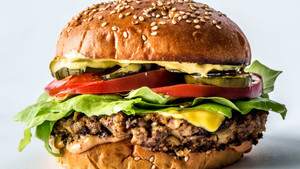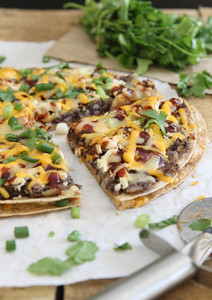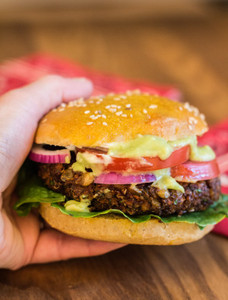
BBQ Black Bean and Eggplant Veggie Burgers
Inspiring CooksRecipe
BBQ Black Bean and Eggplant Veggie Burgers
Ingredient prep
40 mins.
Cook time
45 mins.
Total time
1 hr. 25 mins.
A veggie burger you might actually catch yourself craving. Enough said.
By: Tessa - slightly adapted
Dish Type: Entree
Cuisine: Comfort Food
Makes: about 12 burgers
Ingredients
For burgers
- 1 medium eggplant (about 1 lb.)
- 1 T vegetable oil (plus more, if pan frying)
- 1 small red onion, quartered lengthwise, with ends left on
- 1 poblano pepper, halved lengthwise
- 5 or 6 cloves garlic, peeled
- 3 C cooked black beans (2 cans)
- 1 C coarsely ground cashews (unsalted; roasted or raw. Grind in food processor or finely chop. There should be a few larger pieces)
- 3 T masa
- 1 T tomato paste
- ¼ C BBQ sauce (We Rub You Korean BBQ Sauce), plus more for serving
- 1¼ t kosher salt
- ¼ t ground black pepper
- 1 whole large egg (optional; see notes)
For serving
- Pepper jack cheese, grated or sliced (about ¼ cup grated per burger)
- Sliced mushrooms sautéed in butter or olive oil (allow about 2 oz. mushrooms per burger)
- Pickled red onions (recipe in my eCookbook)
- BBQ sauce
- Burger buns
- Butter or mayonnaise (vegan or regular; for toasting buns)
Make It
- Turn broiler on and move rack about 8 to 10 inches from heat. Wash and dry eggplant, pierce in about 8 places with a paring knife, and use fingertips to coat thinly with oil. Broil on a foil-lined baking sheet about 20 minutes, turning about every 5 minutes until blackened on all sides and heavy with moisture. Reduce oven to 450, move one rack into bottom third of oven, and set eggplant aside on a cutting board to cool. When cool enough to handle, halve lengthwise to release steam. Peel charred skin from eggplant and discard, pull flesh into strips, remove conspicuous clusters of seeds, and place in a colander set over a bowl to drain.
- Use fingertips to lightly coat cut sides of onion with more oil. Place with one cut side down on the baking sheet and add poblano pepper halves, face up, and peeled garlic cloves to the sheet. Roast 10 minutes, then turn poblanos cut side down and turn onions so remaining cut sides face down. Remove any small, darkened garlic cloves. Roast 5 more minutes, until peppers are charred and onions are soft and caramelized. Reduce oven to 350, and place rack in middle position. After cooling vegetables and garlic, remove stems and seeds from peppers and roughly chop everything. Pulse in food processor to chop finely (or do so by hand. However, you’ll need the food processor anyway, so it’s easiest to use it) then empty into a large mixing bowl.
- Spread drained black beans on the baking sheet in a single layer, then cook in oven until dried and beginning to crack, about 8 to 10 minutes. Cool on tray, so escaping steam doesn’t add moisture and condensation in the food processor or bowl. Add half the beans to the bowl with the vegetables and pulse the other half 2 to 3 times for a couple seconds each, until coarsely chopped but not mashed. Add to mixing bowl.
- Once further cooled, stir and press eggplant in the colander with a wooden spoon to release the last of the excess moisture. Pulse in food processor until just creamy, with a few chunks expected. Add to mixing bowl.
- Add remaining ingredients, except egg, to the mixing bowl and stir to combine thoroughly. Taste and add more salt and pepper if desired. Stir in egg until well incorporated, breaking up the yolk as you stir. Do not taste once raw egg has been added.
- Refrigerate mixture 15 to 30 minutes (or up to 6 to 8 hours) to allow masa to moisten, binding the burgers. Form balls of ⅓ cup each (or desired size) of the mixture, then press to ½ inch thickness (3 to 4 inch diameter) and lay on wax paper or a plate. At this point, cook the burgers, or cover the patties with plastic wrap, ensure they’re not touching each other, and freeze until solid (around 3 hours). Wrap individually with foil, or just toss into a freezer bag. Thaw 5 to 10 minutes on a couple layers of paper towels before cooking.
- To bake (recommended): Place frozen or fresh patties onto a parchment-lined baking sheet. Bake on middle rack of a 400 degree (F) oven about 20 minutes, until moderately browned on bottom. Turn burgers over and bake 10 minutes more. Remove from oven, add a layer of grated cheese, sauteed mushrooms, and more grated cheese, then bake another 5 to 10 minutes, until cheese is melted.
- To fry on the stovetop: Over medium, heat enough vegetable oil in a nonstick skillet to thinly coat the pan. Once hot, add as many patties as will comfortably fit, reduce heat slightly, and cook 4 to 6 minutes per side, until browned on the outside and cooked through. Add cheese and mushrooms after flipping burgers over. To aid melting of cheese, cover the skillet for a minute or two at the end (do not add water as you might with a beef patty--it will cause the veggie burger to loosen and potentially fall apart).
- Toast buns!
- Spread halved buns with vegan or regular butter or mayonnaise and place buttered sides on a moderately hot skillet (preferably cast iron). Fry until golden, a few minutes, monitoring closely.
Notes
Nutrition: Burgers are vegetarian and can be made vegan and the patties (without bun) are gluten free. As always, check ingredient lists on any packaged items when cooking for an allergy or otherwise strict diet.
On vegan patties: I cooked one burger using the mixture before adding the egg, and it held together well. I personally like the bit of extra firmness the egg provides, and the amount per burger is negligible (1/12th of an egg); however, to make these vegan, just omit the egg (and cheese topping) and confirm that none of your other ingredients contain animal products. I didn’t test it with this recipe, but I’ve successfully used flax eggs in veggie burgers before, and that substitution would likely provide a bit of extra binding.
On vegan patties: I cooked one burger using the mixture before adding the egg, and it held together well. I personally like the bit of extra firmness the egg provides, and the amount per burger is negligible (1/12th of an egg); however, to make these vegan, just omit the egg (and cheese topping) and confirm that none of your other ingredients contain animal products. I didn’t test it with this recipe, but I’ve successfully used flax eggs in veggie burgers before, and that substitution would likely provide a bit of extra binding.
Note: This page contains affiliate links. It does NOT contain sponsored content. Affiliate links (to products I recommend, on Amazon) offset my ingredient and website maintenance costs, so I can keep bringing you juicy recipes like this one.


